How Ice Dams Form in Wisconsin Winters
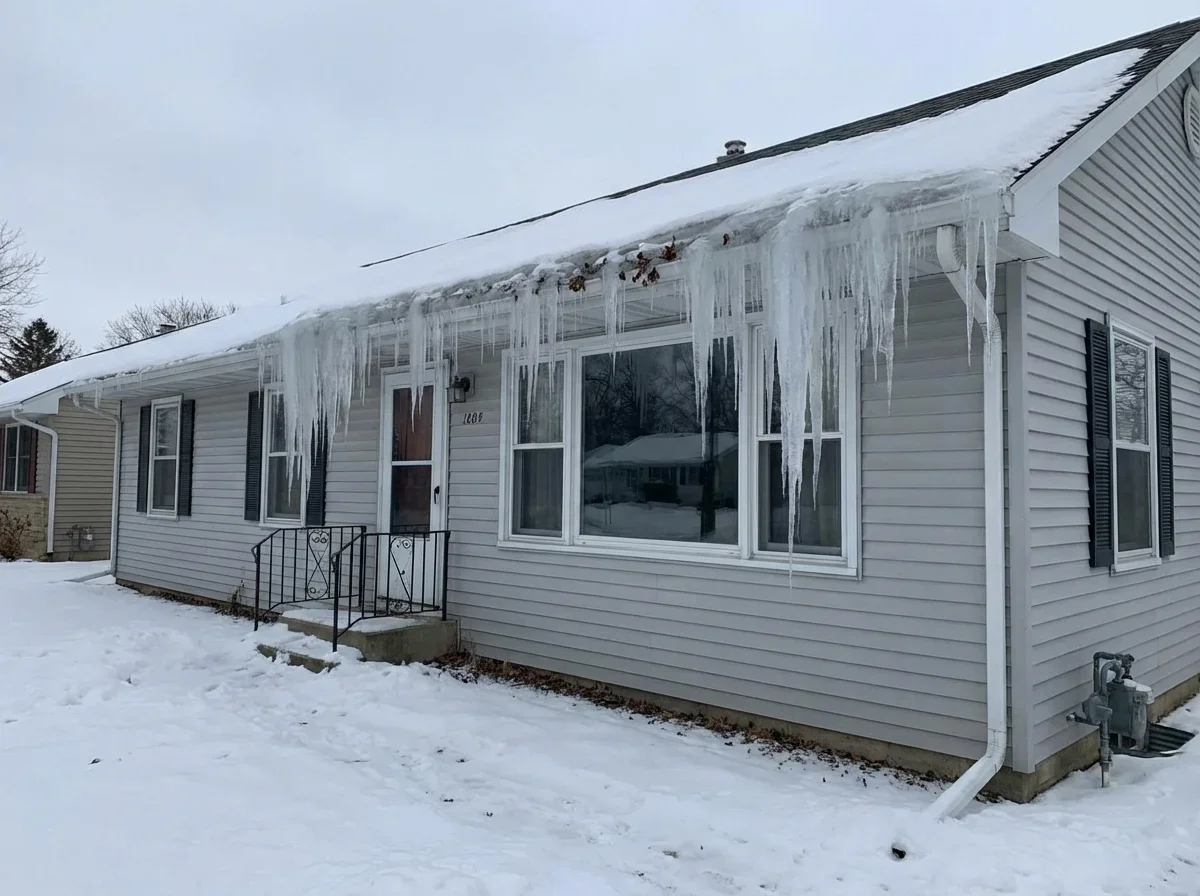
You know the pattern. It snows six inches. Your furnace runs. Heat escapes through the attic and warms the roof deck. The bottom layer of snow melts, runs down to the cold eaves, and refreezes. Within 48 hours, you've got a ridge of ice blocking the gutter.
Then the real problems start.
Water backs up under the shingles. It seeps into the fascia, the soffit, even the interior walls. Appleton homeowners discover this when they see water stains on the ceiling or ice forming inside the attic. By then, the damage is already happening.
Fox Valley weather creates textbook ice dam conditions. The temperature hovers in the 20-30°F range for weeks — cold enough to freeze meltwater, warm enough that attic heat keeps melting snow. We get the lake-effect snow from Green Bay, the temperature swings, and the poorly insulated older homes that lose heat through the roof deck.
The Wisconsin Historical Society specifically warns homeowners: extreme ice damming cases require professional intervention with electric heating cables wired by qualified electricians, and the best prevention is maintaining a cold roof through proper ventilation.[1]
You can't control the weather. You can control whether ice forms at your roofline.
Here's what happens when you wait: A 20-foot ice dam weighs 250-400 pounds. It pulls gutters off the fascia ($800-1,200 to replace), rips shingles ($400-600 per section), and forces water into wall cavities (mold remediation starts at $2,000). Insurance covers some of it — after you pay the deductible and watch your rates climb.
Prevention costs less than one repair call. Heat cable systems installed in October work all winter. No roof raking at midnight. No emergency calls when water drips through the light fixture.
Homeowners in Oshkosh and Neenah with walkout basements face extra risk — ice dams create water that eventually finds the foundation. The problem compounds.
What Does Ice Dam Prevention Cost in the Fox Valley?
Heat cable installation runs $800-$2,500 for a typical residential roof in the Fox Valley. The price depends on roof length, system type, and how much electrical work your home needs.
| System Type | Material Cost | Installation | Total Cost | Best For |
|---|---|---|---|---|
| Standard cable (120V) | $200–$400 | $400–$600 | $600–$1,000 | Single-story, seasonal removal |
| Self-regulating cable | $400–$800 | $600–$1,000 | $1,000–$1,800 | Year-round, energy efficient |
| Commercial-grade system | $800–$1,200 | $1,000–$1,500 | $1,800–$2,700 | Two-story, complex rooflines |
| Control systems (add-on) | $150–$300 | $100–$200 | $250–$500 | Automatic temperature sensing |
Installation costs increase with roof complexity. A ranch home in Menasha with 60 linear feet of eaves costs less than a two-story colonial in Green Bay with multiple valleys and dormers. Electrical work adds $200-500 if you need a new circuit or exterior outlet.
System Selection Factors
Self-regulating cable costs more upfront but saves 30-40% on winter electricity. It adjusts heat output based on temperature — full power at 20°F, minimal power at 40°F. You install it once and leave it year-round.
Standard cable draws consistent power regardless of temperature. Many Appleton homeowners remove it each spring to extend cable life, then reinstall in October. This works fine if you’re comfortable with seasonal maintenance.
Valley runs and gutter loops require extra cable length. A typical home needs:
- Eave edges: 3-6 feet of zigzag coverage along the full roofline
- Valley runs: Full length from peak to eave on each valley
- Gutter loops: 12-18 inches into downspouts
- Problem areas: Extra coverage where ice consistently forms
The Real Cost Comparison
Heat cables prevent the damage. Insulation reduces heat loss. You need both for older homes, but cables deliver immediate protection this winter.
Kaukauna homeowners with ice dam history save money by installing systems before the first heavy snow. Emergency mid-winter installation costs 40-60% more — contractors charge premium rates for December roof work in Wisconsin weather.
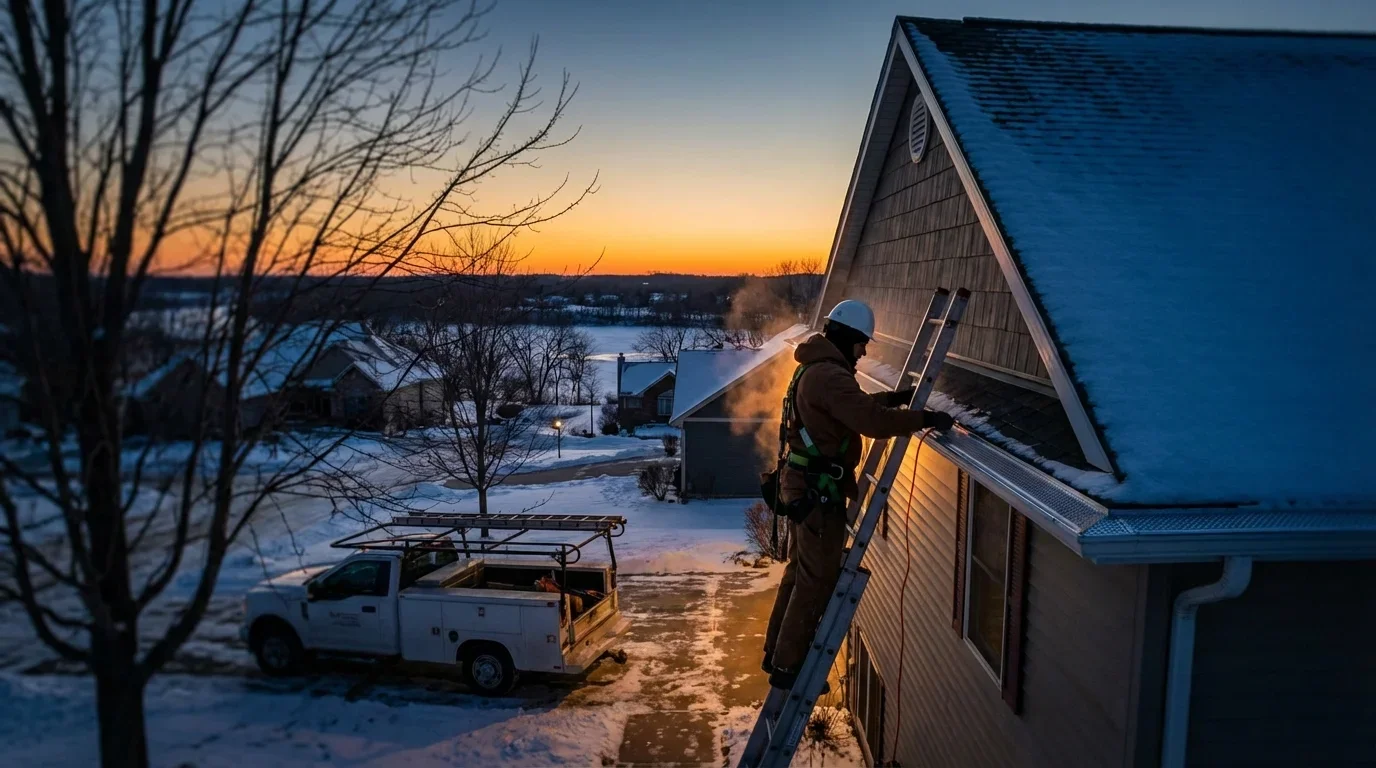
The Ice Dam Prevention Process
Professional installation takes 4-6 hours for a typical residential home. The work combines roofing and electrical expertise — this isn't a DIY project unless you're comfortable on ladders in cold weather and pulling electrical permits.
Site Assessment and Measurement
The contractor walks your roofline to identify problem areas. They measure eave length, count valleys, check gutter condition, and note where ice formed in previous winters. Homes in Green Bay with north-facing sections need heavier coverage — those areas stay cold longest and accumulate more snow.
They also inspect your electrical panel. Heat cable systems draw 5-10 amps depending on length. If your panel runs near capacity, you'll need a new circuit. Most homes built before 1990 require some electrical upgrades.
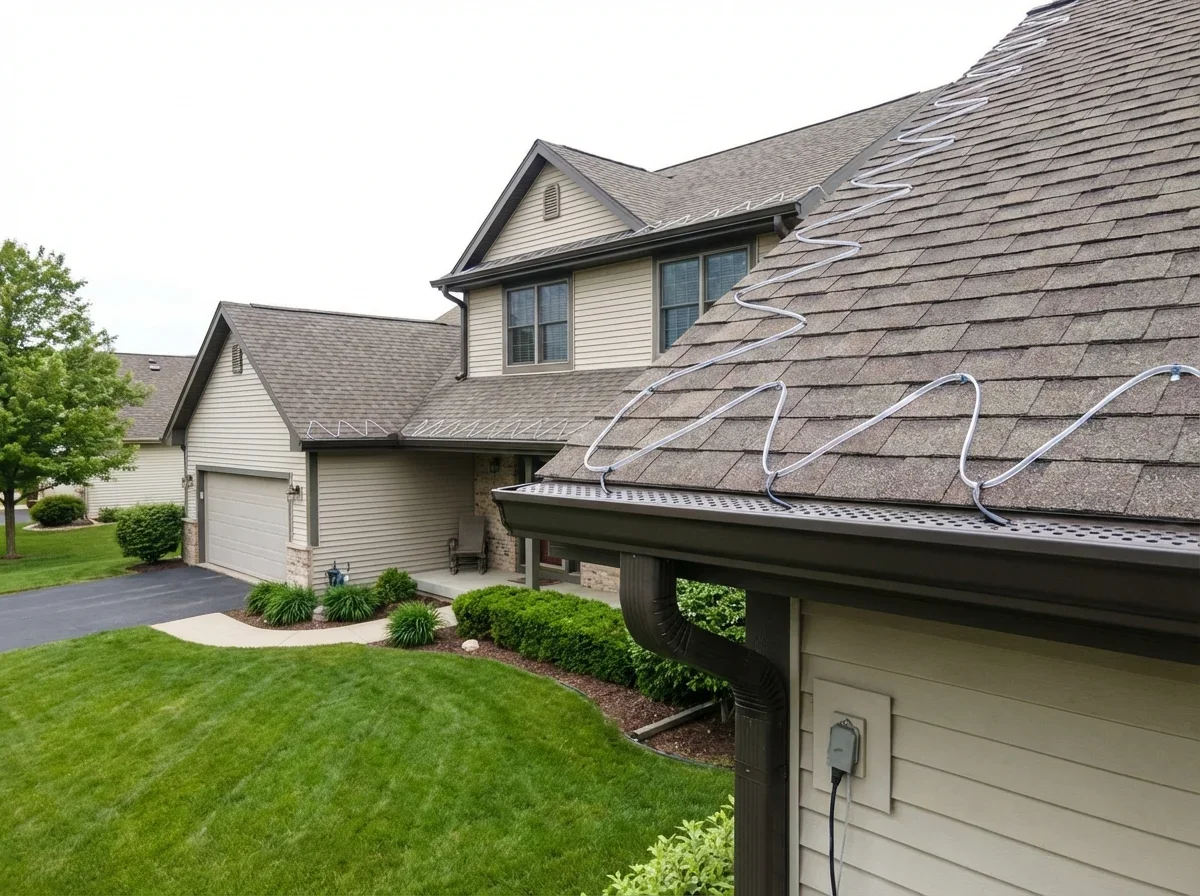
Cable Layout and Installation
The contractor starts at the roof edge, creating a zigzag pattern that extends 3-6 feet up from the gutter line. This coverage zone targets where ice forms — right at the eave overhang where the roof transitions from heated to cold.
Valley runs get priority. Water flows down valleys before it flows anywhere else, and ice accumulates fast. The cable runs from peak to eave, providing a melt path for water to reach the gutter.
Attachment methods depend on your roof type:
- Asphalt shingles: Clips that slide under shingle tabs without penetrating the roof
- Metal roofing: Specialized brackets that clamp to standing seams
- Commercial flat roofs: Adhesive-backed cable or ballasted systems
The cable loops into gutters and downspouts, preventing ice plugs that block drainage. Each downspout gets 12-18 inches of heated cable.
Electrical Connection and Controls
The electrician runs power from your panel to an exterior outlet near the roofline. Professional installations include GFCI protection — required by code and critical for safety around melting ice and water.
Many homeowners add automatic controls. Temperature sensors activate the system when conditions hit ice dam range (usually 28-34°F with snowpack present). This saves electricity compared to running cables all winter regardless of weather.
Timing and Seasonal Considerations
October through mid-November is installation season in the Fox Valley. Contractors have availability, weather cooperates, and you're ready before Thanksgiving snowfalls. December installations happen but cost more and depend on roof conditions.
Self-regulating systems stay installed year-round. Standard cable systems get removed in April when temperatures consistently stay above freezing. Spring removal extends cable life by reducing UV exposure during summer months.
Expect a brief system test after installation. The contractor plugs in the cables, verifies even heating along the run, and confirms the GFCI functions properly. You'll see slight steam rising from the cable — that's normal.
How to Choose an Ice Dam Prevention Contractor
The right contractor handles both roofing and electrical work — or coordinates licensed subcontractors for each trade. Wisconsin requires electrical permits for permanent heat cable installations, and you want someone who pulls permits rather than skipping the inspection.
Critical Qualifications to Verify
Electrical licensing comes first. Ask for the contractor's Wisconsin electrical license number and verify it's current through the Department of Safety and Professional Services. Some roofing contractors install the cable but subcontract electrical connections — that's fine as long as a licensed electrician does the wiring.
Look for contractors who install multiple system types. Good installers know when self-regulating cable makes sense versus standard cable. They explain the cost difference and let you decide based on your budget and how long you'll own the home.
Questions That Reveal Experience
"How do you determine cable spacing for our roof pitch?" Experienced installers adjust coverage based on pitch — steeper roofs need different patterns than low-slope roofs. Generic answers suggest they install the same way every time.
"What brand cables do you install and why?" Quality contractors use Raychem, Heat Trace, or equivalent commercial-grade products. Cheap imported cables fail within 2-3 years. You want cables rated for outdoor use with UV-resistant jackets.
"Do you provide a system diagram and electrical specs?" Professional installations include documentation showing cable routes, circuit specifications, and control settings. You'll need this for insurance claims or future electrical work.
Red Flags That Signal Problems
Contractors who promise "we can do it this weekend" during peak season are either desperate for work or overbooked and rushing jobs. Quality installers in Appleton and Oshkosh book weeks out in October.
Avoid anyone who suggests skipping the electrical permit. Unpermitted electrical work voids your homeowner's insurance and creates liability if something goes wrong. Wisconsin inspectors specifically check for GFCI protection and proper circuit sizing.
Watch for contractors who dismiss your roof's condition. If your shingles are damaged or gutters sag, cables won't save you. Honest installers point out roofing problems before installation — and sometimes recommend fixing those first.
Warranty and Service Expectations
Cable warranties run 2-5 years for materials, but installation workmanship warranties matter more. You want coverage for attachment failures, electrical issues, and cable damage caused by improper installation.
Ask what happens if the system fails mid-winter. Some contractors offer emergency service calls; others don't work on roofs between December and March. Know the policy before you sign.
Compare at least three contractors before deciding. The Fox Valley has qualified installers who've handled hundreds of ice dam prevention systems on homes similar to yours. Use the directory to find contractors with electrical licensing, roofing experience, and local references you can verify.
Frequently Asked Questions
Once an ice dam forms, quick removal prevents water damage to your roof and gutters. The most effective methods include:
- Ice melt products — Apply calcium chloride or other ice melt to the ice dam area to break it down gradually ($10-$30 per application)
- Ice dam removal tools — Use specialized tools or a roof rake to carefully break ice into small chunks and remove them ($0-$50 if DIY with rented tools)
- Professional removal — Hire an ice dam specialist to safely remove it with steam or mechanical methods ($700-$900/hour)
- Heat cables — Install heat tape along gutters and downspouts to prevent future dams ($200-$600 installed)
- Improve attic ventilation and insulation — Address root cause by reducing heat loss that melts snow (varies; often $500-$2,000)
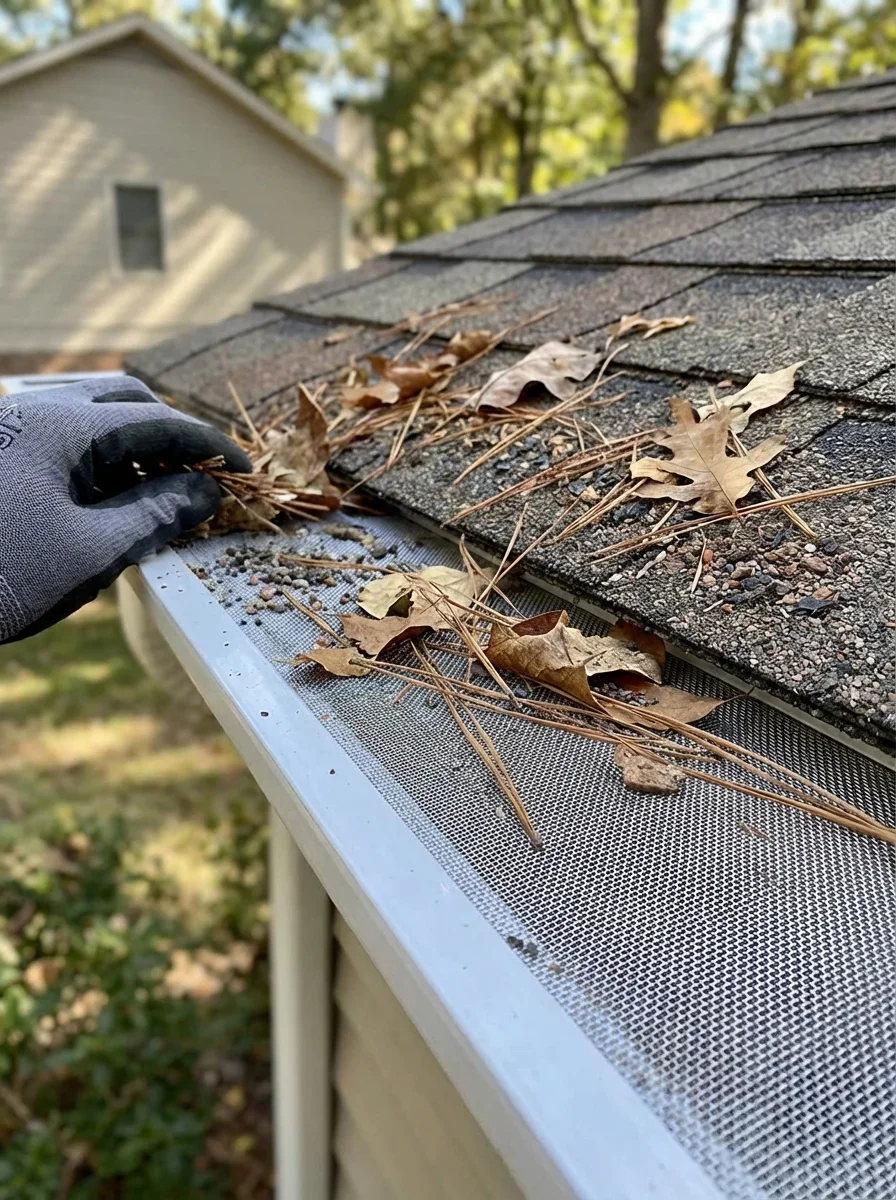
For immediate relief, ice melt is fastest. For long-term prevention, improve ventilation and maintain clean gutters year-round.
- Wisconsin Historical Society. "Preventing Ice Dams on Your Historic Building." https://wisconsinhistory.org/Records/Article/CS4211. Accessed February 11, 2026.
Related Articles
Best Gutter Guards: What Contractors Actually Recommend
Discover which gutter guard systems contractors trust most. Compare micro mesh, reverse curve, and foam systems based on real performance, not marketing hype.
Read Guide
Gutter Guards and Ice Dams: Prevention, Risks & Professional Solutions
Do gutter guards prevent or cause ice dams? Learn how different guard types affect winter ice buildup and what contractors recommend for cold climates.
Read Problem